Renovating a home can be an exciting and transformative experience. Whether it's a small remodeling project or a complete overhaul, the end result often leaves homeowners eager to enjoy their newly renovated spaces. However, before they can fully immerse themselves in their revitalized home, there's an important task at hand: post-renovation cleaning. In this article, we will provide step-by-step instructions and valuable tips to help homeowners effectively clean up after home renovations, ensuring a clean and refreshed environment.
Before embarking on the meticulous task of post-renovation cleaning, it is of utmost importance to ensure that you are adequately prepared. Adequate preparation not only facilitates a smoother cleaning process but also contributes to your overall safety and efficiency. So, let's delve into the essential steps you should take to get yourself ready.
First and foremost, gather all the necessary cleaning supplies and tools. These indispensable companions will aid you in tackling every nook and cranny, leaving no residue or dust particle behind. Equip yourself with trusty microfiber cloths, designed to capture even the tiniest speck of dust with their gentle touch. Arm yourself with dusters that effortlessly whisk away debris from surfaces, giving them an immaculate finish. A vacuum cleaner, preferably one with a HEPA filter, will prove invaluable in suctioning up any loose particles that have settled on the floors or carpets. For those hard-to-reach places and stubborn stains, a reliable mop will be your steadfast ally. And don't forget to have buckets, filled with fresh water, readily available for a swift and efficient cleaning process.
Cleaning solutions are the secret weapons in your arsenal, each designed to combat specific cleaning challenges. Stock up on a range of cleaning solutions suitable for various surfaces and materials. Whether it's a specialized cleaner for stainless steel appliances or a gentle but effective solution for delicate tiles, having a well-rounded selection will ensure that no cleaning conundrum remains unsolved. And let's not overlook the importance of protective gear. Safeguard yourself with sturdy gloves, shielding your hands from harsh chemicals and ensuring their safety. Likewise, invest in protective eyewear to shield your delicate eyes from any accidental splashes or debris.
Before diving into the cleaning process, it's important to gather the necessary cleaning supplies. Here are the essential items you will need for post-renovation house cleaning:
To effectively remove dust and debris from surfaces, you'll need the following dusting tools and equipment:
Choose appropriate cleaning solutions and chemicals to tackle different surfaces and stains. Some essential ones include:
Ensure you read and follow the instructions on the labels to use them safely and effectively.
To clean floors and carpets effectively, gather the following tools:
Having both a broom and a vacuum cleaner is useful for clearing up larger debris before using a mop or vacuum.
During post-renovation cleaning, it's important to protect yourself. Make sure to have the following items:
Wearing protective gear will help prevent injuries and reduce exposure to dust and harmful chemicals.
While preparing your cleaning supplies is crucial, your safety should always take precedence. It is essential to wear appropriate clothing, such as long sleeves and pants, to shield your skin from any potential irritants or harmful substances. Furthermore, ensure that the cleaning area is a child and pet-free zone. This precaution will not only safeguard your little ones or furry friends but will also enable you to focus on the task at hand without any distractions or safety concerns.
By taking the time to adequately prepare and gather all the necessary tools and supplies, you are setting yourself up for a successful post-renovation cleaning journey. Remember, the right tools, combined with your careful attention and diligence, will transform your recently renovated space into a spotless haven, ready to be enjoyed to its fullest extent. So, let's roll up our sleeves and embark on this cleaning adventure, knowing that we are fully prepared for the task that lies ahead.
To guide you through the post-renovation cleaning process, we've compiled a comprehensive checklist:
One of the most significant challenges after home renovations is dealing with the copious amount of dust and debris that settles everywhere. Begin by dusting surfaces and furniture using microfiber cloths or dusters. Be thorough and pay attention to often-neglected areas like light fixtures, baseboards, and ceiling fans. Once the dusting is complete, vacuum the floors using a vacuum cleaner with a HEPA filter, which effectively captures fine particles. Mop hard floors with a suitable cleaning solution to remove any remaining dust and grime. Don't forget to clean windows and mirrors using a streak-free glass cleaner for a sparkling finish.
Walls and ceilings are prone to collecting dust and may have stains or marks from the renovation process. To clean walls, start by dusting them to remove loose debris. Use a mild cleaning solution and a soft cloth or sponge to gently wipe the walls. If there are stubborn stains, consider using a stronger cleaner or a mild detergent solution. Avoid using abrasive cleaners that may damage the paint or wallpaper. Similarly, address any marks on the ceiling using appropriate cleaning methods and products, paying attention to any debris that may have accumulated in corners or on light fixtures.
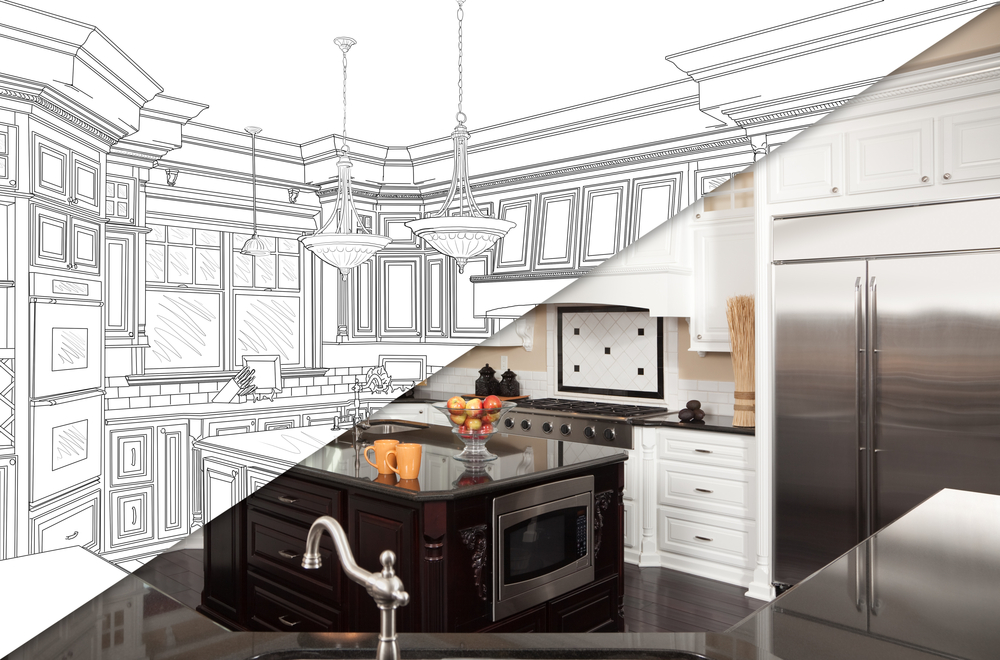
The kitchen and bathroom are often the most heavily used spaces in a home and require thorough cleaning after renovations. Begin by cleaning countertops, cabinets, and appliances using suitable cleaning solutions and non-abrasive cloths or sponges. Pay attention to any grime or adhesive residue left behind by construction materials. In the bathroom, scrub sinks, tubs, and toilets using appropriate cleaners and tools. Don't forget to address grout lines and tile surfaces, which may require specialized cleaning solutions or techniques.
Different types of flooring materials require specific cleaning methods. For hardwood, laminate, or vinyl floors, sweep or vacuum first to remove loose dirt and dust. Then, clean the floors using a suitable floor cleaner or a mixture of warm water and mild detergent. Take care not to saturate the floors to prevent any water damage. If you have carpets or rugs, consider professional steam cleaning or use a carpet cleaner to remove embedded dirt and debris. For tile or stone surfaces, use a suitable cleaner and a non-abrasive mop or cloth to restore their shine.
During the renovation process, it's common for various construction residues to be left behind, such as paint splatters, adhesive residue, sawdust, plaster, and drywall dust. These remnants can mar the beauty of your newly renovated space if not properly addressed. Fortunately, there are effective methods to remove these residues and restore the pristine condition of your home.
Take caution and test these products in an inconspicuous area first to ensure they don't cause any damage or discoloration. Following the instructions provided with the solvents or paint removers, gently apply them to the affected areas and allow them to work their magic. Once the residues have loosened, carefully remove them using a soft cloth or sponge. Remember to work slowly and patiently, as rushing the process may lead to unintended consequences.
A vacuum cleaner or a broom can be useful tools in this regard. Carefully vacuum or sweep the affected areas, ensuring that you reach into corners and crevices where the residues may have accumulated. It's important to exercise caution and use vacuum cleaner attachments or brooms with soft bristles to avoid scratching or damaging the surfaces.
Damp cleaning methods, such as mopping or wiping, are effective in capturing and eliminating these particles. Start by dampening a mop or cloth with clean water or a mild cleaning solution suitable for the surface you are cleaning. Wring out any excess liquid to prevent over-saturation. Then, systematically work your way across the space, paying close attention to areas where residues are more prevalent. Take your time and be thorough, ensuring that you reach all surfaces, including walls, floors, and furniture. Rinse the mop or cloth regularly to prevent cross-contamination and maintain optimal cleaning effectiveness.
Wear appropriate personal protective equipment, such as gloves and a dust mask, to safeguard your health. Adequate ventilation is also essential, so open windows or use fans to promote air circulation and minimize the inhalation of dust particles or cleaning fumes. Additionally, be mindful of your physical surroundings and any potential hazards that may have been left behind during the renovation. Clear the area of debris or sharp objects before commencing the cleaning process to prevent accidents or injuries.
By following these guidelines and taking the necessary precautions, you can effectively remove construction residues and restore the cleanliness of your newly renovated home. Remember, patience and attention to detail are key to achieving the best results. With a little effort and the right approach, you can enjoy a beautifully renovated space that sparkles with freshness and invites you to bask in its renewed glory.
Proper ventilation is crucial after home renovations to improve air quality and remove lingering odors. Open windows and doors to promote air circulation, allowing fresh air to enter and stale air to exit. Consider using air purifiers with HEPA filters to capture airborne particles and improve overall air quality. Additionally, check and clean HVAC systems, including filters, to prevent the circulation of dust and debris throughout the house.
During the renovation process, upholstery and fabric items can accumulate dust and dirt. To clean upholstered furniture, start by vacuuming thoroughly to remove loose debris. Follow up with appropriate cleaning methods, such as spot cleaning or using a fabric cleaner recommended for the specific material. For curtains, drapes, and blinds, check the manufacturer's instructions for cleaning guidelines. Launder or dry clean fabric items according to their care labels to ensure proper cleaning without causing damage.
After completing the cleaning tasks, take a moment to inspect the space for any missed areas. Pay attention to hidden corners, nooks, and crannies that may have accumulated dust or debris. Once you're satisfied with the cleanliness, consider adding a touch of freshness to the space. Use air fresheners, scented candles, or natural remedies like essential oils to create a pleasant atmosphere. Finally, arrange your furniture and decor to showcase the beauty of your newly renovated space.
Post-renovation cleaning is a crucial step in the home renovation process. By following the step-by-step instructions and tips outlined in this article, homeowners can effectively remove dust, debris, and construction residue, transforming their newly renovated spaces into clean and refreshed environments. A thorough and systematic approach to cleaning ensures that homeowners can enjoy the fruits of their renovation labor in a healthy and comfortable living space.
©2026 | Tidy Vibe Cleaning
"*" indicates required fields